نماد اعتماد
نماد اعتماد

Openfiler یک سیستم عامل مستقل است که به عنوان file-based, network-attached و storage area network عمل می کند.ز نصب این سیستم عامل شما توانایی تخصیص و گسترش disk volumes و share data را از طریق (SAN(storage area network و NAS(network attached storage) خواهید داشت.
Openfiler بسیاری از نیازهای شما را به یک Iscsi SAN فراهم می کند. در بسیاری از موارد افراد با تخصیص یک ماشین مجازی در VMware workstation و Esxi از این سیستم عامل استفاده می کنند. Openfiler به صورت ۳۲bit ،۶۴bit ،Iso ،VMware ESX Server و XEN appliances قابل دانلود می باشد. Openfiler علاوه بر پشتیبانی از LDAP با ارائه volume-management مدیریت بر Storege ها را بسیار تسهیل بخشیده است.
در کل Openfiler یک روش مدیریت حافظه است که با هسته Linux 2.6 ارائه شده است و از تمامی دایرکتوری های شبکه پشتیبانی می کند.
برخی از ویژگی های آن :
Powerful block storage virtualization
Extensive share management features
Accounts management
Quota / resource allocation
Other features
Full industry-standard protocol suite
نیازمندی های اولیه و مورد نیاز برای نصبOpenFiler
x86 or x64 based computer with at least 512MB RAM and 1GB storage for the OS image.
At least one supported network interface card
A CDROM or DVD-ROM drive if you are performing a local install
A supported disk controller with data drives attached.
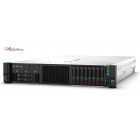
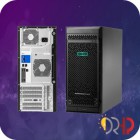
البته شما نیازمندی سخت افزاری زیاد بالایی برای نصب وراه اندازی این سرور نخواهید داشت و بهترین راه برای نصب وراه اندازی تهیه یک سرور ML310 G8 معمولی میباشد که بهترین گزینه شما میباشد .البته در بسیاری از پروژه های نصب و راه اندازی خود بنده در پروژه ها وسایت های مختلف معمولا برای پیاده سازی از این سولشن استفاده میکرده ام./
| پارتیشن بندی دیسک های شما |
البته مقوله ی RAIDدر سرورهای اج پی داستان های مربوط به خود را دارد که سعی خواهیم کرد در فرصت مناسب انها را توضیح داده و پیرامون این موضوع نیز البته تخصصی درمورد سرور های HP نیز مطالبی را بگذاریم.
You need to create three partitions on the system in order to proceed with the installation:
"/boot" - this is where the kernel will reside and the system will boot from
"swap" - this is the swap partition for memory swapping to disk
"/"- this is the system root partition where all system applications and libraries will be installed
Create /boot Partition
The following is a list of all entries required to create the boot partition:
Mount Point: /boot
Filesystem Type: ext3
Allowable Drives: select one disk only. This should be the first IDE (hda) or first SCSI disk (sda)
Size(MB): 100 (this is the size in Megabytes, allocate 100MB by entering "100")
Additional Size Options: select Fixed Size radiobutton from the options.
Force to be a primary partition: checked (select this checkbox to force the partition to be created as a primary partition)
After configuration, your settings should resemble the following illustration:
Once you are satisfied with your entries, click the OK button to create the partition.
Create / (root) Partition
Proceed by creating a root partition. Click on the New button. You will be presented with the same form as previously when creating the boot partition. The details are identical to what was entered for the /boot partition except this time the Mount Point: should be "/" and the Size(MB): should be 2048MB or at a minimum 1024MB.
Once you are satisfied with your entries, click the OK button to proceed.
Create Swap Partition
ههمانطور که اطلاع دارید پارتیشن swapبرای ایجاد فضای کمکی بیشتر به رم سرور شما ایجاد میگردد تا در صورتی که سرورنیاز به رماضافی تر داشته باشد بتواند با هارد شما swapکند و جابجایی ها را انجام بدهد.
Proceed by creating a swap partition. Click on the New button. You will be presented with the same form as previously when creating the boot and root partitions. The details are identical to what was entered for the boot partition except this time the Mount Point: should swap. Use the drop down list to select a swap partition type. The Size(MB): of the partition should be at least 1024MB and need not exceed 2048MB.
Once you are satisfied with your entries, proceed by clicking the OK button to create the partition. You should now have a set of partitions ready for the Openfiler Operating System image to install to. Your disk partition scheme should resemble the following:
در این قسمت دیگر پارتیشن بندی سرور شما کاملا به پایان رسیده هست و سیستما شما از نظر درایوری پارتیشن بندی اماده بهره برداری میباشد./